
 Menu
Menu
The New Mexico Homeowner’s Quick-Start Guide to Spring Swamp Cooler Maintenance
Knowing how to maintain a swamp cooler at the start of the season in New Mexico can mean the difference between walking into a cool home in June and scrambling for a repair appointment during the first heat wave. Here’s a fast answer to get you started:
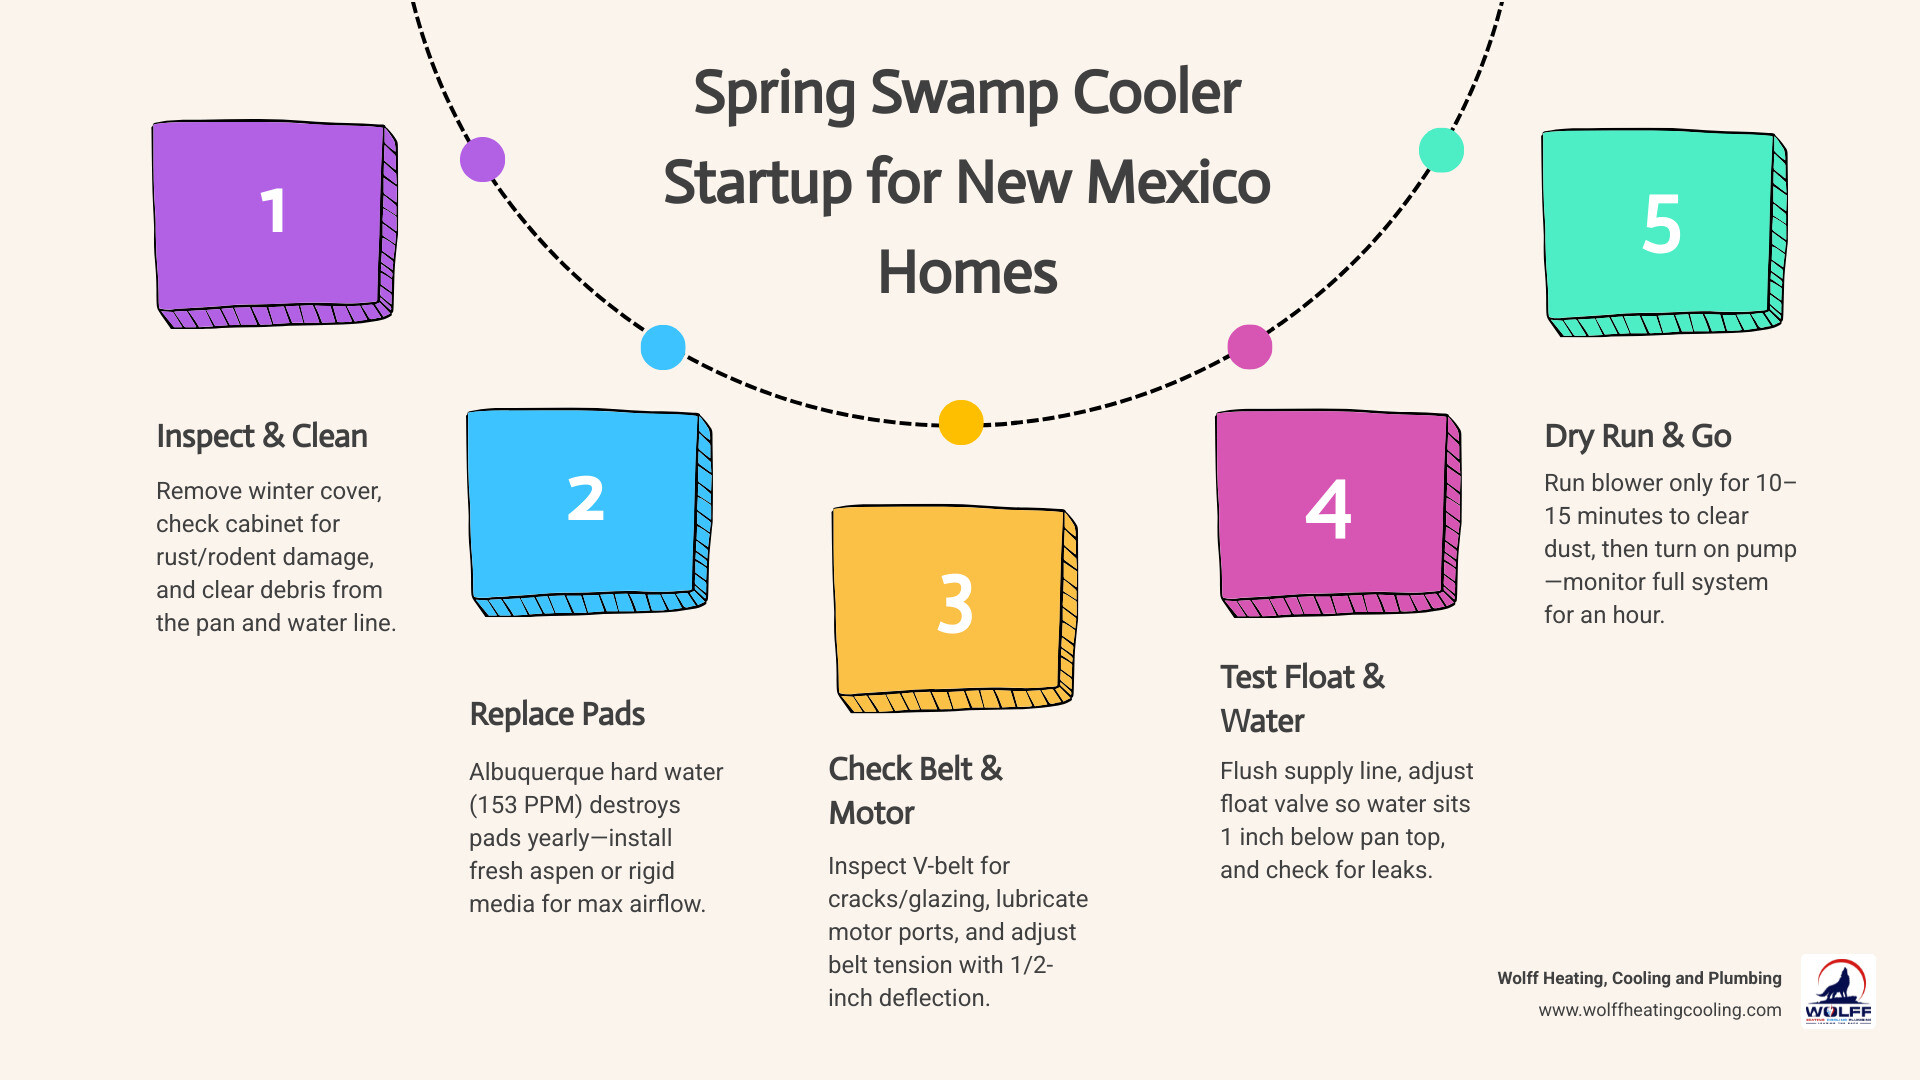
Spring Swamp Cooler Startup — Quick Steps for New Mexico Homeowners:
- Remove the winter cover and damper slide — open the unit up and inspect the cabinet for rust, rodent damage, or corrosion
- Replace the evaporative pads — Albuquerque’s hard water (153 PPM) destroys pads in a single season; replace them every year
- Flush the water supply line — clear out winter debris and rust before reconnecting to the float valve
- Inspect and adjust the float valve — water level should sit about one inch below the top of the pan
- Check the V-belt — look for cracking, glazing, or fraying and replace any belt that looks marginal
- Lubricate the motor — add oil to the designated ports if your motor has serviceable bearings
- Run the blower first (pump off) — let it run 10–15 minutes to clear winter dust before turning on the water pump
- Check for leaks and test the full system — monitor for at least an hour before leaving the house
Most homeowners in Albuquerque, Rio Rancho, and Placitas should target the first two weeks of May for startup — after the freeze risk has passed but before the first 90°F days arrive.
If you live in New Mexico, your swamp cooler isn’t just a nice-to-have — it’s your front line against triple-digit heat. Albuquerque hit 100°F or higher 17 times in 2023 alone, and a properly maintained evaporative cooler can cool your home by up to 40°F while using up to 75% less electricity than central air conditioning. But the key word is properly maintained. A unit that sat under a cover all winter needs more than a flip of a switch to be ready for a New Mexico summer.
The challenge here is that standard maintenance advice written for other parts of the country often misses two things that matter a lot in New Mexico: the hard water coming out of your tap and the elevation your cooler is running at. Both of those factors change what you need to do — and how often.
Before you climb onto your roof or pull out your tools, it is helpful to review our Cheat Sheet to Spring Cooling Maintenance for Desert Homes to understand how our unique climate impacts your home’s comfort systems.
Why New Mexico’s Climate Demands Special Startup Care
While evaporative cooling is incredibly efficient in our high desert climate, New Mexico presents unique environmental challenges that aren’t addressed in generic internet DIY guides.
First, let’s talk about our water. Albuquerque’s municipal water averages 153 parts per million (PPM) of total dissolved solids, which is roughly 12 grains per gallon (GPG) of water hardness. This hard water is packed with calcium carbonate and magnesium. As water evaporates from your cooler pads to cool your home, these minerals are left behind. Within a single season, they form a thick, crusty white scale that blocks airflow, degrades the pads, and forces your system to work twice as hard.
Second, our high elevation plays a major role in how your cooler operates. At 5,312 feet above sea level in Albuquerque, the air is roughly 17% less dense than it is at sea level. Because the air is thinner, your blower motor has to move a higher volume of air to achieve the same cooling effect. This puts extra physical stress on your fan belt and motor. A belt that might survive another summer at sea level has a much higher chance of failing under the elevation-induced stress of the high desert.
If you are wondering whether your system is up to the task, you can learn more about assessing its performance in our guide on Is Your New Mexico Swamp Cooler Actually Working?.
Why You Must Know How to Maintain a Swamp Cooler at the Start of the Season in New Mexico
Skipping your spring startup routine or relying on generic advice can lead to several major issues:
- Severe Mineral Scaling: Left untreated, hard water scale will completely clog your pads, reducing airflow and causing your indoor temperatures to climb.
- Premature Belt Failure: High desert elevation demands optimal belt tension. A loose or worn belt will slip, wear down your motor pulley, and eventually snap on the hottest day of the year.
- Wasted Water: A swamp cooler can use anywhere from 3 to 15 gallons of water every hour. If your float valve is improperly adjusted, that water can constantly run down your drain or, worse, overflow onto your roof.
- System Breakdown: Nine times out of ten, mid-summer cooling failures are caused by skipping basic spring prep.
Getting your system ready early ensures you won’t be left sweating during our first major heat wave. For a complete look at preparing your entire home for the summer months, check out The Ultimate New Mexico Summer Readiness Checklist for Your Home.
How to Maintain a Swamp Cooler at the Start of the Season in New Mexico
Performing a proper spring startup requires a systematic approach. Before you turn on any switches, you need to physically prepare the unit.
Start by removing the winter weather cover from the exterior of the cabinet. Wipe down any windblown desert dust and debris that accumulated on the outside of the unit. Next, you must remove the metal damper slide—often called the “cookie sheet”—from the duct opening inside the cooler cabinet. If you forget to remove this metal sheet, your blower will push air against a solid metal wall, which can overheat your motor and prevent any cool air from entering your home.
Once the cabinet is open, check the water supply line. During our winterization process, this line should have been disconnected and drained to prevent freeze damage. Inspect the line for any hairline cracks that may have developed during winter freezes, especially if you live in colder areas like Tijeras or Cedar Crest. If the line looks good, reconnect it to the float valve.
For a simplified overview of this process, you can also read our step-by-step article on How to Maintain a Swamp Cooler in 5 Easy Steps.
Checklist: How to Maintain a Swamp Cooler at the Start of the Season in New Mexico
Follow this detailed checklist to ensure every component of your evaporative cooler is ready for the summer:
- Install Fresh Evaporative Pads: Because of New Mexico’s hard water, you should replace standard aspen wood fiber pads every single year. If you have a Mastercool or rigid media unit, the thicker, paper-like pads can last 2 to 3 years, but they must still be gently cleaned of surface scale and dust at the start of the season.
- Flush the Water Distribution Tubes: Mineral deposits love to clog the small holes in your water distributor spider tubes. Soak these tubes in white vinegar or a mild scale remover for 20 to 30 minutes, then use a toothpick or wire to clear any stubborn blockages.
- Check the V-Belt Tension: Inspect the belt for cracks, fraying, or a shiny, “glazed” appearance. Press down on the center of the belt; it should have between 1/2 and 3/4 inch of deflection. If it is too loose, adjust the motor bracket to tighten it. If it is cracked or worn, replace it immediately.
- Inspect the Water Pump: Clear any debris or mineral scale from the pump’s intake screen. A clogged screen will starve the pump, preventing water from reaching the pads and leaving you with nothing but warm air.
- Lubricate the Motor and Bearings: If your blower motor or fan shaft bearings have small oil ports (usually capped with yellow or red plastic covers), add a few drops of high-quality SAE 20 non-detergent zoom-spout oil. Do not use WD-40, as it is a solvent, not a lubricant, and will ruin your bearings.
- Flush the Water Line: Before connecting the line directly to your float valve, run water through it for a couple of minutes into a bucket. This flushes out any rust, dirt, or pipe scale that accumulated over the winter, preventing it from immediately clogging your new float valve.
Essential Tools and Safety Precautions for DIY Startup
Working on a swamp cooler combines three elements that require extreme caution: heights, water, and electricity. Your safety should always be your top priority.
Each year in the United States, falls from ladders cause more than 164,000 emergency room-treated injuries and 300 deaths. When performing DIY maintenance on a rooftop unit, always secure your ladder to the edge of the roof to prevent it from sliding. Ensure the ladder extends at least three feet above the roofline so you have a secure handhold when stepping on and off.
Before you touch any internal components of the cooler, disconnect the electrical power. Most rooftop units have a local disconnect switch or plug near the unit. If yours does not, turn off the dedicated breaker at your home’s main electrical panel. Water and electricity are a deadly combination, and you should never risk working on a live system while standing in a wet cabinet on a metal roof.
To make your trip to the roof as efficient as possible, pack a bucket with all the necessary hand tools and safety gear:
- Safety goggles and heavy-duty work gloves
- Replacement evaporative pads and a new V-belt (matching your current belt’s length and width)
- Adjustable wrenches, screwdrivers, and a wire brush
- Zoom-spout cooler oil (SAE 20 non-detergent)
- Replacement float valve (always smart to have a spare)
- A shop-vac to clear out winter debris from the bottom pan
Troubleshooting Common Startup Issues
Even with careful preparation, you might encounter issues during your first run of the season. Use the table below to quickly identify normal system behaviors versus warning signs that require immediate action:
| What You Experience | Likely Cause | Corrective Action |
|---|---|---|
| Musty, dusty odor (first 15 minutes) | Normal winter dust clearing out of the ductwork. | Open windows and run the blower on “fan only” to flush the dust out. |
| Persistent musty or moldy smell | Old, moldy pads or standing water biofilm in the pan. | Replace the pads immediately and scrub the bottom reservoir with mild soap. |
| Screeching or squealing sound | Loose fan belt or unlubricated blower bearings. | Tighten the belt to 1/2–3/4 inch deflection or lubricate the bearings. |
| Burning rubber smell | A slipping, worn, or misaligned fan belt. | Turn off the unit immediately, inspect the belt alignment, and replace if worn. |
| Sharp electrical or metallic smell | Blower motor winding failure or seized bearings. | Shut down power and call a professional licensed technician to inspect the motor. |
| Water overflowing onto the roof | Stuck, misaligned, or damaged float valve. | Adjust the float arm downward or replace the float valve assembly. |
| Warm air blowing (dry spots on pads) | Clogged water distributor tubes or a failed water pump. | Clear the distributor tube holes or inspect the pump for power and debris. |
If you run into complex electrical issues, water leaks, or a motor that refuses to start, don’t risk damaging your system or injuring yourself. You can find detailed solutions to these problems in The Ultimate Guide to Evaporative Cooler Troubleshooting.
Frequently Asked Questions About New Mexico Swamp Coolers
When is the best time to start up a swamp cooler in New Mexico?
The ideal window for starting up your swamp cooler in Albuquerque, Rio Rancho, and the surrounding areas is the first two weeks of May.
In New Mexico, our spring weather can be incredibly unpredictable. Late-season cold snaps can bring freezing overnight temperatures well into late April. Because a swamp cooler requires a constant supply of water, starting your system too early exposes your copper or plastic water lines to freeze-and-burst risks.
Additionally, unlike refrigerated central air conditioning, you cannot easily switch back and forth between heating and cooling with a swamp cooler. To run your cooler, your furnace must be completely shut down, and your duct dampers must be adjusted. Waiting until early May ensures that freezing nights are behind us and you won’t be caught in an uncomfortable, freezing house during a late-spring cold front.
If you want to learn more about how to monitor your system’s output as the summer heat intensifies, read How to Know When Your Swamp Cooler Stops Working Effectively.
How often should swamp cooler pads be replaced in Albuquerque?
In Albuquerque and surrounding New Mexico communities, standard swamp cooler pads must be replaced annually at the start of every spring season.
While generic online articles might tell you that pads can last two to three years, this advice does not apply to our hard water climate. The high concentration of calcium carbonate in our local water supply creates a heavy mineral scale buildup on the pads within a single summer. This scale hardens into a cement-like barrier that restricts airflow, reduces water absorption, and causes your blower motor to work significantly harder, driving up your energy bills.
Starting every season with fresh, clean pads is the single easiest way to maximize your cooler’s efficiency and maintain excellent indoor air quality.
How do you properly winterize a swamp cooler at the end of the season?
Proper winterization is just as important as spring startup. In New Mexico, you should schedule your winterization shutdown in mid-to-late October, well before our average first freeze in mid-November.
To winterize your system:
- Turn off the water supply valve to the cooler (usually located near your outdoor spigot or in your crawlspace).
- Disconnect and drain the water line completely to prevent water from freezing and splitting the pipe.
- Drain all standing water from the bottom reservoir pan of the cooler.
- Scrub away any accumulated mineral scale and dirt from the pan to prevent corrosion over the winter.
- Install the metal damper slide (cookie sheet) inside the duct to prevent cold winter drafts from entering your home.
- Install a high-quality, weather-resistant winter cover over the exterior of the cabinet to protect the unit from high desert wind, snow, and dust.
Conclusion
Taking the time to perform proper spring maintenance on your evaporative cooler ensures your home remains a comfortable, energy-efficient oasis all summer long. While many homeowners choose to tackle this checklist as a weekend DIY project, climbing onto a hot roof, handling heavy panels, and working around electrical components isn’t for everyone.
If you prefer to leave the hard work to the experts, we are here to help. At Wolff Heating, Cooling, and Plumbing, we have over 25 years of experience serving homeowners in Albuquerque, Rio Rancho, Placitas, Corrales, Cedar Crest, Tijeras, and Bernalillo. Our team of licensed, bonded, and insured professionals will handle your spring changeover safely and efficiently, ensuring your system runs perfectly when you need it most.
Ready to get your home ready for the summer heat? Visit our Swamp Cooler Albuquerque NM page to schedule your professional spring changeover service today!